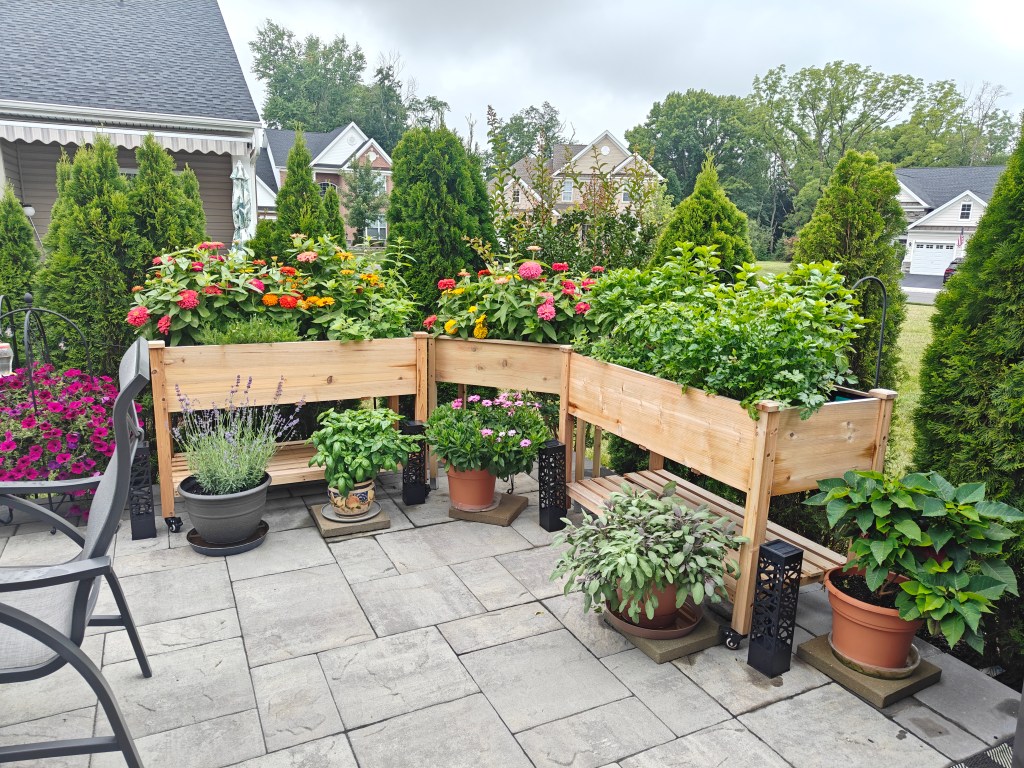
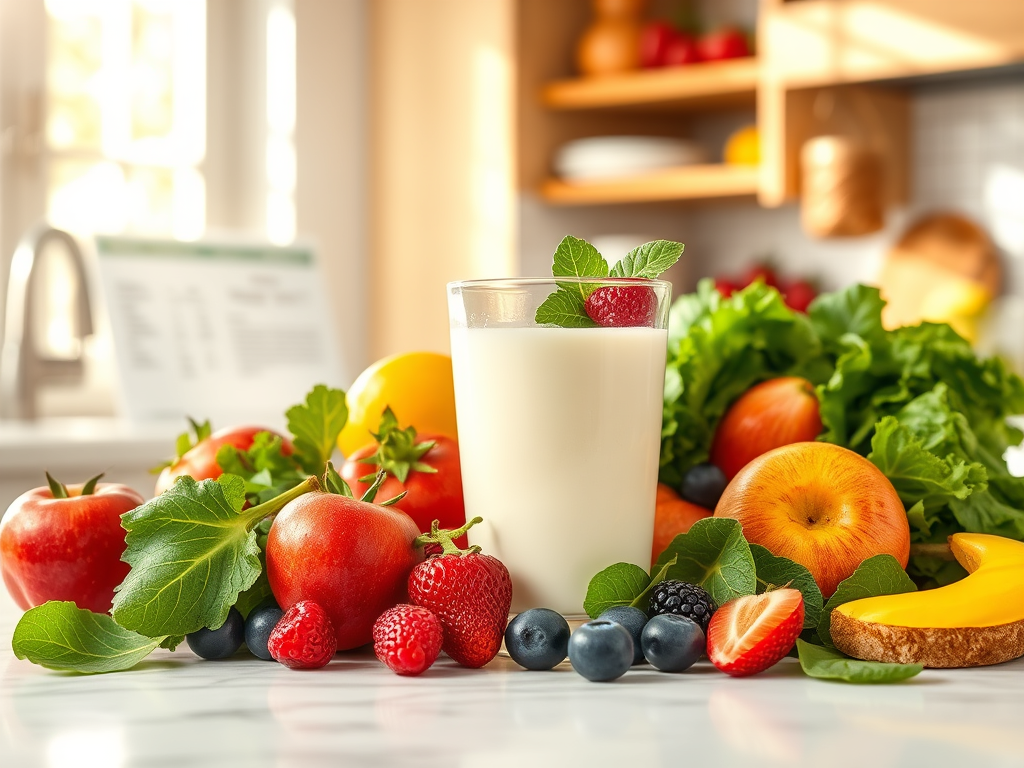
Growing herbs from seed is a rewarding and cost-effective way to fill your garden, windowsill, or patio with fresh flavors and aromas. Whether you want to enhance your cooking, create natural remedies, or simply enjoy the beauty of lush greenery, starting herbs from seed gives you full control over the growing process. We grow a garden of herbs and vegetables every year in raised #AD planter beds like this. These raised planters allow us to enjoy growing our plants without having to bend down.

Here are some ideas for starting your garden.
Choosing the Right Herbs
Not all herbs are equally easy to grow from seed. Some sprout quickly and thrive with minimal effort, while others require more patience and care. Here are some beginner-friendly options:
Basil –A flavorful herb with a wide range of culinary uses, basil adds a fresh, sweet, and slightly spicy taste to many dishes, particularly in Mediterranean cuisine. It is easy to grow, thrives in most climates, and can be harvested frequently throughout the growing season, providing a continuous supply of fresh leaves for cooking. We dry some of our basil, store it in jars, and freeze whole leaves. Freezing the leaves in a plastic bag or in ice cube trays with a little oil allows us to break off just what we need for a recipe, making it convenient for making pesto or adding it to marinara sauce. Our stored basil has lasted throughout the year, and we’ve also shared many jars with friends and family.
An easy pesto recipe using basil leaves from Love and Lemons
- ½ cup toasted pine nuts
- 2 tablespoons fresh lemon juice
- 1 small garlic clove
- ¼ teaspoon sea salt
- freshly ground black pepper
- 2 cups basil leaves
- ¼ cup extra-virgin olive oil, plus more for a smoother pesto
- ¼ cup freshly grated Parmesan cheese, optional
Instructions
-
In a food processor, combine the pine nuts, lemon juice, garlic, salt, and pepper and pulse until well chopped.
-
Add the basil and pulse until combined.
-
With the food processor running, drizzle in the olive oil and pulse until combined. Add the Parmesan cheese, if using, and pulse to briefly combine. For a smoother pesto, add more olive oil.
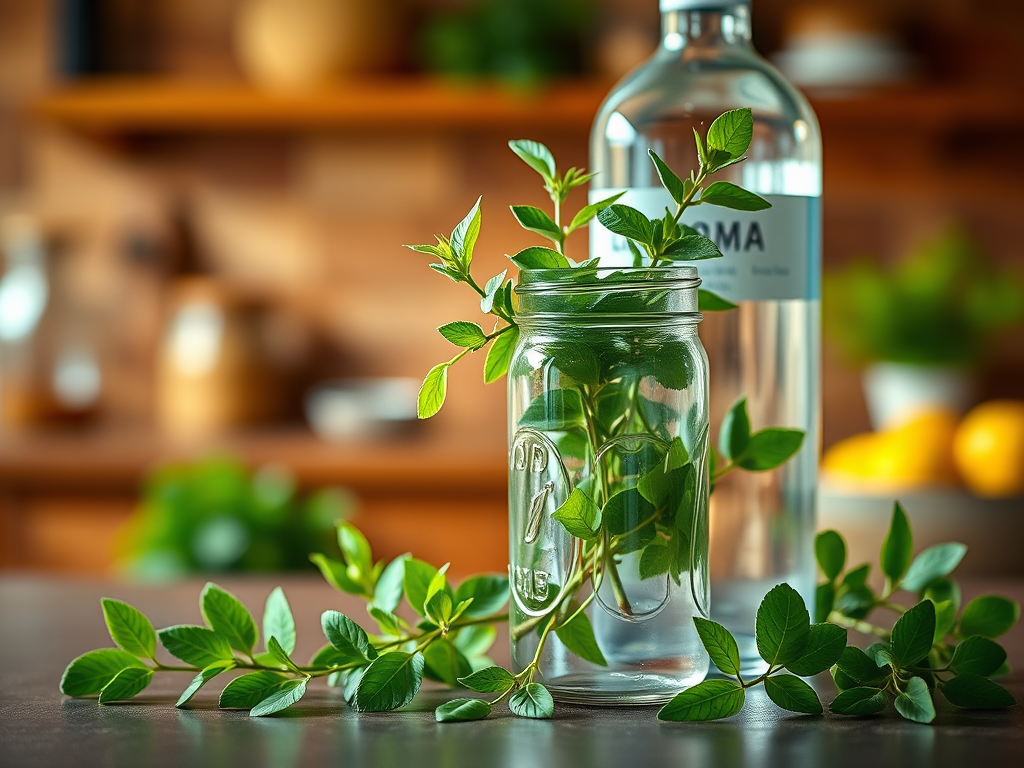
Parsley – Slow to germinate but worth the wait. Growing parsley in raised planters is an excellent choice, as it allows for well-draining soil and easier harvesting access. Parsley prefers rich, moist soil and is partial to full sun. Be patient, as parsley seeds can take up to three weeks to germinate. Once established, regular harvesting encourages continued growth. Parsley is another favorite of ours. We use it regularly in many different recipes because of its versatility. In a food processor, pulse the cleaned dry parsley until it’s roughly chopped up. Parsley, just like basil, may be kept in the freezer. Freeze it in a plastic bag with oil or in an ice cube tray. The frozen cubes of parsley oil can then be used to flavor roasted vegetables or to make a quick finishing sauce or salad dressing.
Chimichurri sauce recipe using parsley from Love and Lemons
Chimichurri is a tangy sauce with fresh herbs, garlic, olive oil, and vinegar. Drizzle it over roasted veggies, use it as a salad dressing, or toss it with any cooked grain for a vibrant pop of flavor. We like to use Chimichurri on steak. Sooo good!
Ingredients
- ⅓ cup extra-virgin olive oil
- 2 tablespoons white wine vinegar
- 1 garlic clove, minced
- ½ teaspoon sea salt
- ¼ teaspoon dried oregano
- ¼ teaspoon red pepper flakes
- ¼ teaspoon smoked paprika
- ½ cup finely chopped fresh flat-leaf parsley (from about 1 bunch of parsley, coarse stems removed)
Instructions
-
In a small bowl, whisk together the olive oil, vinegar, garlic, salt, oregano, red pepper flakes, and smoked paprika. Stir in the parsley. Alternatively, you could combine the ingredients in a mortar and pestle or with a few pulses in a food processor.
-
Season to taste and serve as a sauce over roasted or grilled vegetables.
Sage – A hardy, drought-tolerant herb that takes time to germinate but rewards patience with fragrant, flavorful leaves. Sage prefers well-drained soil and full sun. Growing it from seed requires warmth and consistent moisture, and seedlings should be thinned to allow space for bushy growth. Once established, sage is a low-maintenance perennial that enhances both the garden and the kitchen. This perennial returns from its dormancy yearly for us, even after a long frost. Sage has a long history of use as a spice and for health purposes. It was used as a traditional herbal remedy in ancient Greece and Rome and in Native American and Chinese medicine. Today, sage is promoted for sore mouth or throat, memory loss, diabetes, high cholesterol levels, and other conditions.
Sage has some other interesting uses. Burning sage, also known as smudging, has many potential benefits, including the following:
Air purification: Sage can remove bacteria, viruses, and fungi from the air
Mood improvement: Sage can help lift spirits and reduce stress and anxiety
Sleep quality: Sage may help ease insomnia
Aromatherapy: The aroma of sage can be relaxing and help you focus
Mindfulness: The ritual of burning sage can help you achieve a sense of calm and clear-headedness. You may be surprised to know that Sage has antioxidant and anti-inflammatory properties that may support health. Possible health benefits of sage include protecting the body’s cells, protecting against neurodegenerative disease and cognitive dysfunction, lowering total cholesterol and blood glucose levels, and managing inflammation. That is a good enough reason to start growing sage.
Oregano – A robust, aromatic herb that thrives in warm, sunny conditions. Oregano seeds are tiny and should be surface-sown, as they need light to germinate. It requires well-drained soil and consistent moisture until it is established. Once mature, oregano is drought-tolerant and can be harvested frequently for use in a variety of dishes, particularly in Italian and Greek cuisine.
Oregano is another herb that is used regularly in our kitchen. We use it in tomato sauce, stews, and even topped on our homemade pizza. Oregano is commonly combined with olive oil to create flavorful oregano oil, Italian vinaigrettes, and marinades for lamb, chicken, and beef dishes
We found that we could dry our herbs continuously throughout the growing season. We harvest (see harvesting below) our plants and dry the leaves in our garage in this #AD 6-layer herb drying rack. It works really well, is affordable, and easy to maintain. Of course you can also hang your herbs decoratively, but we have so many that we find it best to use the drying rack.
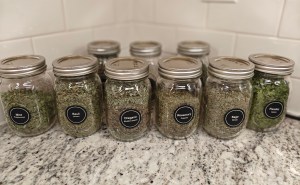 Here are some of the jars of herbs we harvested in one season.
Planting Your Herb Seeds
Once you’ve chosen your herbs, follow these steps to ensure successful germination:
- #AD Use Quality Seeds – Fresh, high-quality seeds have better germination rates. Here is a great variety of 17 herbs to be grown indoors or out. Heirloom quality, non-GMO.
- Choose the Right Containers – Seed trays, #AD small pots, or even recycled containers with drainage holes work well.
- Use Lightweight, Well-Draining Soil – A seed-starting mix is ideal.
- Plant Seeds at the Right Depth – Check the seed packet for specific instructions, but a general rule is to plant seeds about twice as deep as their size. Here is a #AD garden tool set to get started.
- Keep the Soil Moist but Not Waterlogged – Use a spray bottle or gentle watering to maintain consistent moisture.
- Provide Adequate Light – Most herbs need at least 6-8 hours of light daily. If growing indoors, use a grow light if natural sunlight is insufficient.
- Maintain Proper Temperature – Most herb seeds germinate best in temperatures between 65-75°F (18-24°C).
Caring for Your Seedlings
Once your seeds have sprouted, continue providing light, water, and occasional fertilization:
- Thin Out Crowded Seedlings – Snip weaker seedlings at the base to allow stronger ones to thrive.
- Water Gently – Avoid overwatering, as herbs dislike soggy roots.
- Introduce Air Circulation – A small fan or occasional breeze helps prevent mold and strengthens stems.
- Harden Off Before Transplanting – If moving outdoors, gradually expose seedlings to outdoor conditions over a week.
Harvesting and Enjoying Your Herbs
Once your herbs have matured, you can start harvesting! Snip leaves or stems as needed, but avoid taking more than one-third of the plant to encourage regrowth. Fresh herbs can be used immediately, dried for later use, or even frozen in ice cubes for easy meal additions.
Harvesting Herbs for Food and Medicinal Purposes
When harvesting herbs for culinary use, pick leaves in the morning after the dew has dried but before the sun is at its peak. This ensures maximum flavor and essential oil content. Use sharp scissors or pruning shears to avoid damaging the plant. For medicinal purposes, harvest leaves, flowers, or roots at peak potency—typically when the plant is in full bloom. Dry herbs in a well-ventilated, shaded area, or use a dehydrator to preserve their beneficial properties. Store dried herbs in airtight containers away from direct sunlight.
Final Tips for Success
- Be patient! Some herbs take longer to germinate than others.
- Label your plants to keep track of what you’re growing.
- Experiment with different varieties to discover your favorites.
Growing herbs from seed is a simple yet fulfilling way to bring fresh flavors to your kitchen and greenery to your space. With a little care and patience, you’ll have a thriving herb garden in no time!
I’ve selected each item with a link to make your shopping experience easier.
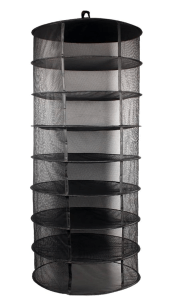
#AD Our drying rack.
Good luck to all of you in this upcoming planting season. We are looking forward to growing, harvesting, and using our herbs in cooking recipes and medicinally.


Please Leave a Reply